data preparation for voxel-based morphometry analysis
Published:
In this post I explain how to prepare the data to do voxel-based morphometry (VBM) using FreeSurfer segmentations.
There are a couple of reasons why I create this pipeline:
- I want to use custom tissue segmentations. Other VBM pipelines perform their own segmentations. In the case that you have invested time in segmenting and quality-checking your results for other purposes than VBM analysis, then it makes sense to utilize them, instead of computing them again from scratch
- The other advantage of building your own pipeline is that you can use your preferred group-wise registration approach. In my case I will use
antsMultivariateTemplateConstruction.sh
The data preparation consists of the following steps:
- Segment tissue
- Build template
- Obtain tissue density maps
Segment tissue
FreeSurfer aseg contains labels for a number of structures. We need to convert aseg labels to tissue labels. We use 3 tissues CSF, GM and WM. Probably CSF gets maped to background in the end (DARTEL does not use a CSF label).
These are the label assignments:
| aseg_id | structure | tissue |
|---|---|---|
| 0 | background | background |
| 2 | left white matter | WM |
| 3 | left cortex | GM |
| 4 | left ventricle | CSF |
| 5 | left inf-ventricle | CSF |
| 7 | left cerebellum wm | background* |
| 8 | left cereb cortex | background* |
| 10 | left thalamus prop | GM |
| 11 | left caudate | GM |
| 12 | left putamen | GM |
| 13 | left pallidum | GM |
| 14 | 3rd ventricle | CSF |
| 15 | 4th ventricle | CSF |
| 16 | Brain Stem | WM |
| 17 | left hippocampus | GM |
| 18 | left amygdala | GM |
| 24 | CSF | CSF |
| 26 | left accumbens | GM |
| 28 | ventral DC | WM |
| 30 | left vessel | CSF |
| 31 | left choroid plexus | CSF |
| 41 | right white matter | WM |
| 42 | right cortex | GM |
| 43 | right ventricle | CSF |
| 44 | right inf-ventricle | CSF |
| 46 | right cerebellum wm | background* |
| 47 | right cereb cortex | background* |
| 49 | right thalamus | GM |
| 50 | right caudate | GM |
| 51 | right putamen | GM |
| 52 | right pallidum | GM |
| 53 | right hippocampus | GM |
| 54 | right amygdala | GM |
| 58 | right accumbens | GM |
| 60 | right ventral DC | WM |
| 62 | right vessel | CSF |
| 63 | right choroid plexus | CSF |
| 77 | WM hypointensities | WM |
| 85 | optic chiasm | WM |
| 251 | CC_posterior | WM |
| 252 | CC_mid_posterior | WM |
| 253 | CC_central | WM |
| 254 | CC_mid_anterior | WM |
| 255 | CC_anterior | WM |
* cerebellum is not used because FreeSurfer segmentations are not very reliable in that structure
Using the python script filter_labels.py from my nimg-scripts repo, it can be done with the following commands:
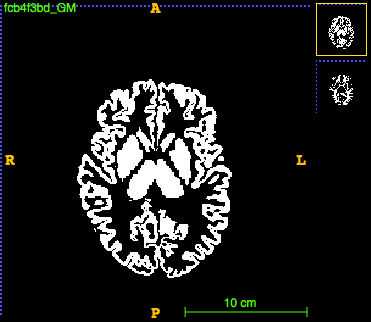
For the grey matter:
run ~/CODE/utils/filter_labels.py --in_dir ~/DATA/VBM_1158_tissue_WMH/tmp/ --in_suffix _aseg.nii.gz --out_dir ~/DATA/VBM_1158_tissue_WMH/tmp/filtered --out_suffix _GM.nii.gz --include 3 10 11 12 13 17 18 26 42 49 50 51 52 53 54 58 --fixed_id 1
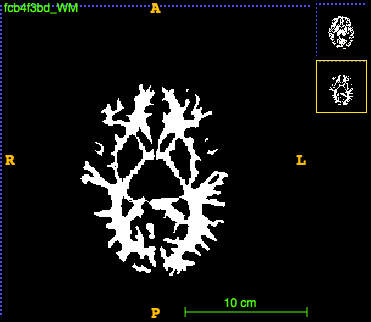
For the white matter:
run ~/CODE/utils/filter_labels.py --in_dir ~/DATA/VBM_1158_tissue_WMH/tmp/ --in_suffix _aseg.nii.gz --out_dir ~/DATA/VBM_1158_tissue_WMH/tmp/filtered --out_suffix _WM.nii.gz --include 2 16 28 41 60 77 85 251 252 253 254 255 --fixed_id 1
The images look like this:
Build template
We build a template by registering the WM and GM maps to a common space. We do this as a multi-modal template construction with antsMultivariateTemplateConstruction2.sh command, where GM and WM are input as separate channels. Here, we do not use all the images, but select a subset of representative participants according to age and gender. I use 150 people. This can be done with my script vbm_subset_template.py
We put the selected WM and GM tissue maps in a directory. These are the files ending in _GM.nii.gz,_WM.nii.gz. We also create a .csv file with each row containing the names of files for all modalities for each image. This can be done with the following bash script (in the same dir as the images).
files=( *_GM.nii.gz )
for file in "${files[@]}"
do
  name="${file%_GM.nii.gz}"
  suffix="_WM.nii.gz"
  echo "$file,${name}${suffix}" >> tpl_files.csv
done
Before we can build the template, we provide an initial template, so that template is constructed in the space of the initial template. We use the average of the individual tissue maps linearly warped to the MNI152 space. Then our template, will conform to MNI spacing and dimensions. We have the transforms from T1 images to MNI152 space, which we have computed using eg, FLIRT. We use the following script to move tissues to MNI space:
files=( ../data/tissue_freesurfer/*_WM.nii.gz )
for file in "${files[@]}"
do
	filename="${file##*/}"
	id="${filename%%_WM.nii.gz}"
	flirt -in ../data/tissue_freesurfer/${id}_WM.nii.gz -ref ../template/MNI152_T1_1mm.nii.gz -applyxfm -init ../data/transforms/t1mni/${id}_t1mni.mat -out ../data/data4initpl/${id}_WMWarped.nii.gz
	flirt -in ../data/tissue_freesurfer/${id}_GM.nii.gz -ref ../template/MNI152_T1_1mm.nii.gz -applyxfm -init ../data/transforms/t1mni/${id}_t1mni.mat -out ../data/data4initpl/${id}_GMWarped.nii.gz
done
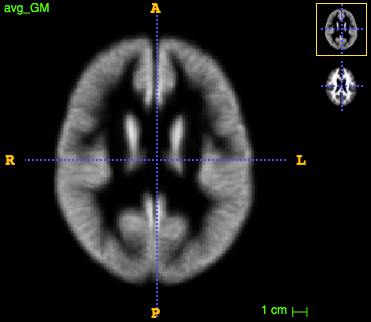
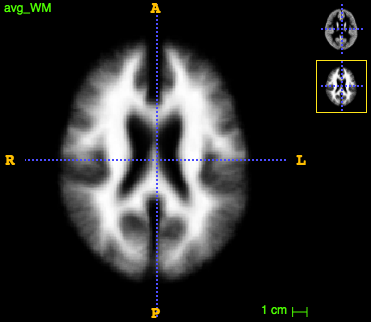
When this is done, we can average the warped tissue maps to create the initial template. This can be done with my script average_images.py as follows:
run ~/CODE/utils/average_images.py --in_dir tmp/ --in_suffix _GMWarped.nii.gz --out_avg tmp/avg_GM.nii.gz
(the same for _WM.nii.gz).
The initial templates look like this:
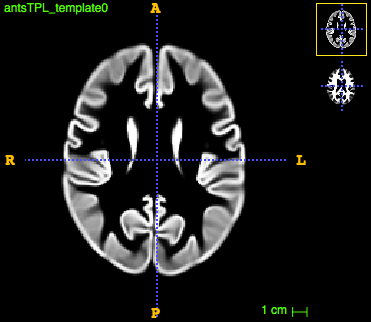
We are all set to create the multi-modal template with antsMultivariateTemplateConstruction2.sh by running the following command:
./antsMultivariateTemplateConstruction2.sh -d 3 -a 0 -b 0 -c 2 -e 1 -g 0.25 -i 4 -j 5 -k 2 -w 1x1 -q 70x50x30x10 -f 6x4x2x1 -s 3x2x1x0 -n 0 -o antsTPL_ -r 0 -l 1 -m CC -t SyN -y 0 -z avg_GM.nii.gz -z avg_WM.nii.gz tpl_files.csv
Note that I use -y 0 to avoid template drift in translation and orientation (having this problem otherwise). Also, decreased the number of iterations wrt the recommendation because it takes too long for so many images.
The final template for both tissues look like this:

Compute tissue density maps
Tissue density maps are computed in the common space so that comparisons across subjects can be carried out. They combine information on the tissue maps of each subject (warped to the template) and the deformations. Amount of tissue for each subject is not preserved when bringing to the common space. Therefore, some information is lost. We avoid this by using information on the deformation. Specifically, we compute tissue density (or concentration) maps by convolving the warped subject in the common space with the Jacobian of the deformation field. In this way, the amount of tissue is preserved, and areas with higher / lower amount of tissue (due to compressing / expanding deformation) will end up with higher / lower tissue density values.
We compute two versions of tissue concentration maps: 1) one having into account both linear and deformable transformation and 2) one only having into account deformable. The second one will only have into account differences after normalizing for head size.
For the 2nd option, we first create composite transformation including linear and deformable components using ANTs as follows:
tpldir="../data/ants_tpl_150"
files=( ${tpldir}/*_GM.nii.gz )
for file in "${files[@]}"
do
	filename="${file##*/}"
	id="${filename%%_*}"
	antsApplyTransforms -d 3 -i ${file} -r ${tpldir}/antsTPL_template0.nii.gz -o [${id}_fulltransf.nii.gz,1] -t ${tpldir}/antsTPL_${id}_GM*1Warp.nii.gz -t ${tpldir}/antsTPL_${id}_GM*0GenericAffine.mat --float || true
where tpldir is the directory containing the ouput of antsMultivariateConstruction2.sh script. The bit || true in the end of the command allows the script to run even some cases throw error (eg, due to missing files).
We create the Jacobian determinants (on both transformation versions) as follows:
tpldir="../data/ants_tpl_150"
files=( ${tpldir}/*_GM.nii.gz )
for file in "${files[@]}"
do
	filename="${file##*/}"
	id="${filename%%_*}"
	CreateJacobianDeterminantImage 3 ${tpldir}/${id}_fulltransf.nii.gz ${id}_jacfull.nii.gz 1 || true
	CreateJacobianDeterminantImage 3 ${tpldir}/antsTPL_${id}_GM*1Warp.nii.gz ${id}_jacdef.nii.gz 1 || true